
Oh, my dear friend, there is a very specific kind of satisfaction that comes from carefully repairing something you could have easily thrown away.
Maybe it’s a favorite blouse with a popped seam. Maybe it’s a pair of trousers that needs a little alteration. Or perhaps it’s a much-loved piece of clothing that simply needs a second chance.
For me, those little repairs bring back memories of my grandmother’s sewing room—the soft hum of her old machine, colorful spools of thread lined up neatly nearby, and that wonderful old-fashioned belief that if something could be repaired, there was no reason to replace it.
And one of the smallest tools in that sewing basket was often one of the most useful:
The humble seam ripper.
It looks almost too simple to be important. But once you know how to use it properly, this little tool can make removing stitches surprisingly easy.
The secret isn’t force.
It’s technique.
So grab your sewing basket, put on your reading glasses, and let’s take a closer look at how to use a seam ripper without damaging the fabric you’re trying to save.
What Is a Seam Ripper?
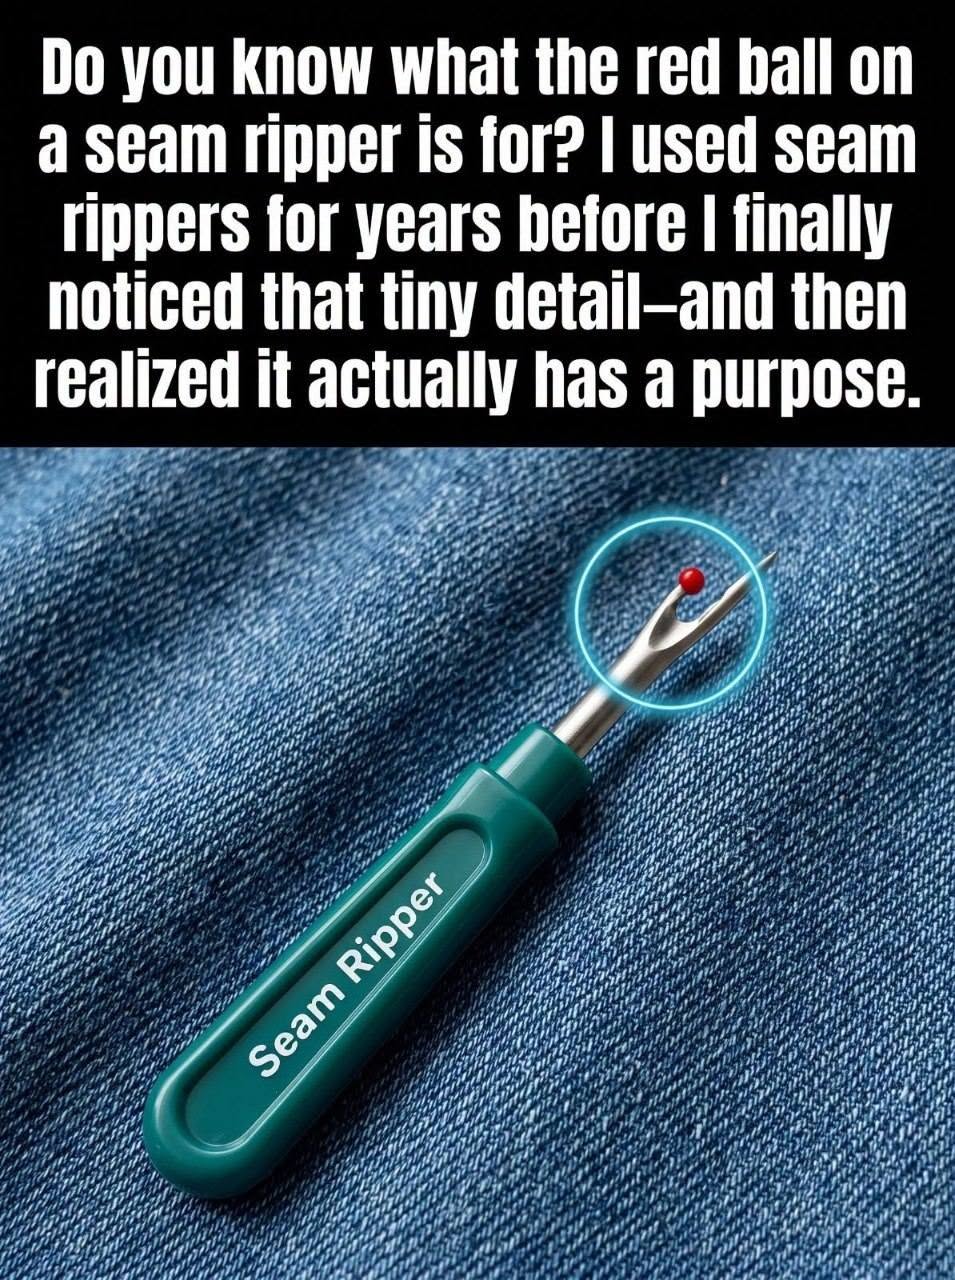
A seam ripper is a small sewing tool designed to cut and remove stitches.
It typically has a handle and a forked metal tip with two points:
One point is sharp and pointed.
The other is longer and usually has a small protective ball on the end.
Between them is a curved cutting edge.
That little cutting edge is what slices through thread.
The tool is particularly useful when you need to remove:
A sewn seam
A hem
Incorrect stitches
Basting stitches
Embroidery stitches
A zipper seam
A section of stitching that needs to be redone
And despite its name, the goal isn’t to “rip” fabric.
You’re really cutting the thread while protecting the fabric.
How Does a Seam Ripper Actually Work?